Creating professional-quality tech review videos requires more than just good content—it demands a streamlined editing process that enhances clarity and engagement without overwhelming viewers.
When editing my AI model review videos, I face several specific challenges. Technical concepts need clear visual representation to be understandable. Viewer engagement must be maintained during complex explanations, which can easily become dry without proper pacing and visual interest.
Audio clarity is essential throughout technical demonstrations, as poor sound quality can undermine even the best content. Additionally, I work to maintain a consistent look and feel across multiple videos to build brand recognition, all while balancing high production quality with an efficient workflow that makes regular publishing possible.
Here’s my systematic approach to video editing that transforms raw footage into polished tech reviews.
My Video Editing Workflow
1. Structured Recording with Bandicam
Great editing starts with great recording. I use Bandicam to capture high-quality screen recordings because it offers exceptional control over capture parameters. I configure my recordings at 1440p resolution at 60fps to ensure smooth playback, particularly important when demonstrating AI interfaces where subtle movements matter. I always record system audio on a separate track from my microphone, which gives me tremendous flexibility during editing to balance these elements appropriately.
Rather than recording continuously, I break recording into logical segments. This approach might seem more labor-intensive initially, but it dramatically simplifies the editing process later. I typically record a focused introduction with webcam emphasis, followed by separate technical explanation segments, individual AI tests, and finally a conclusion with call-to-action. This segmented approach not only simplifies editing but allows me to be more focused during each recording section, resulting in better overall performance and reducing the need for extensive retakes.
2. Audio Enhancement with Gling.ai
Before traditional editing begins, I process my raw audio through Gling.ai. This AI-powered audio processing tool has transformed my workflow by automatically removing filler words (“um,” “uh,” etc.), eliminating awkward pauses, and creating natural-sounding transitions between edited segments. It also helps balance overall volume levels across different recording segments.
This initial AI processing typically reduces my manual audio editing time by approximately 60%, allowing me to focus on content refinement rather than technical cleanup. For a typical 15-minute video, Gling.ai processing removes an average of 2-3 minutes of dead air and filler content while creating more dynamic pacing. What’s particularly valuable is how it maintains my natural speaking rhythm while eliminating distractions, preserving the authenticity of my delivery while making it more polished.
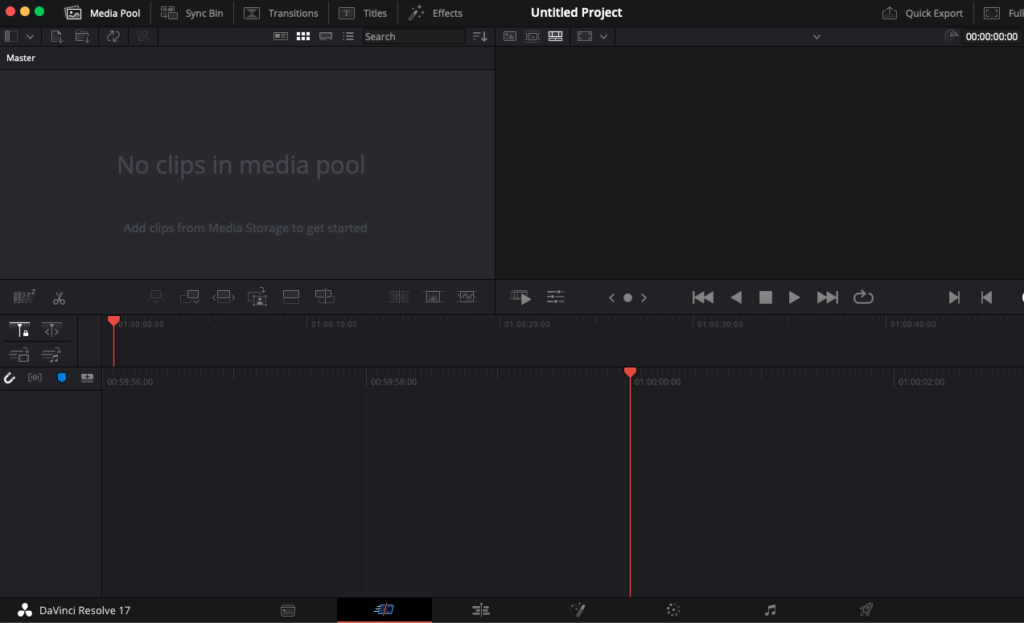
3. Advanced Editing in DaVinci Resolve
With enhanced audio as my foundation, I move to DaVinci Resolve for comprehensive editing. I maintain a consistent project organization across all my videos with separate bins for different recording segments, standardized naming conventions, and templated timeline structures. This organizational discipline might seem excessive for a single video, but it creates enormous efficiency when producing multiple videos and revisiting projects months later.
My editing workflow follows distinct phases. I begin with rough assembly, where I sync the enhanced audio with video, create an initial structure following my script outline, and identify sections needing visual enhancement. Next comes visual enhancement, where I add zoom effects to highlight important UI elements, incorporate text overlays for key points, include transition effects between major sections, and apply color grading to maintain a consistent look.
For AI model reviews specifically, I employ several specialized techniques that enhance viewer comprehension. When comparing multiple AI models, I use split-screen effects to show responses side-by-side, allowing viewers to make immediate visual comparisons. I implement subtle highlight effects to draw attention to specific interface elements without being distracting. During code reviews, I use progressive zoom to maintain context while focusing on specific code sections, helping viewers follow along without losing their place. Throughout the video, I overlay explanatory text for complex concepts or to emphasize key findings, providing visual reinforcement of verbal explanations.
4. Audio Refinement in DaVinci Resolve Fairlight
Even after Gling.ai processing, I perform additional audio work in DaVinci Resolve’s Fairlight workspace. This second pass at audio allows me to apply more nuanced enhancements that the AI processing might miss. I implement noise reduction for consistent background silence, compression to manage dynamic range, EQ to enhance vocal clarity, and add a subtle music bed under key sections to maintain energy and mood.
Technical videos often alternate between explanation and demonstration sections, which presents unique audio challenges. I maintain consistent levels across these changes by normalizing dialogue at -14 LUFS and keeping background music at -24 LUFS (10dB below dialogue). System sounds from demonstrations are carefully balanced to avoid overwhelming narration while still being audible enough to understand what’s happening on screen. This careful audio balancing ensures viewers don’t need to adjust their volume throughout the video, creating a more professional, seamless experience.
5. Color Grading for Brand Consistency
Color treatment creates visual continuity across my tech videos and subtly enhances the viewing experience. I’ve developed a custom LUT (Look-Up Table) that enhances webcam footage for consistent skin tones, creates subtle contrast enhancement for screen recordings, applies a slightly cool temperature for a technical feel, and maintains consistent blacks across varied content types. This consistent color treatment helps establish my visual brand and makes the videos feel professionally cohesive.
I also apply strategic color choices for different AI services. Claude/Anthropic content receives subtle purple tinting, xAI/Grok content gets slight red emphasis, and OpenAI content incorporates blue undertones. These subtle color associations help viewers subconsciously connect with the branding of these AI platforms while creating visual variety throughout the video.
6. Export Optimization
My export settings are optimized for YouTube’s processing algorithm to ensure the highest possible quality. I export at 1440p resolution (even for primarily screen-based content) because YouTube allocates higher bitrates to 1440p content compared to 1080p, resulting in better quality after compression. I use the H.264 codec with high bitrate for initial upload, embed chapter markers for navigation, and include comprehensive metadata for SEO.
Before final upload, each video undergoes a systematic quality control process. This includes a full playback review at normal speed, audio check with headphones to catch any issues, verification of all text elements for legibility, and caption review and correction. This final quality check might add 30-60 minutes to the process, but it prevents embarrassing errors and ensures the final product meets my quality standards.
Implementation Results
This systematic editing process yields consistent benefits across my video content. I’ve seen improved retention metrics as enhanced pacing and visual elements keep viewers engaged through technical explanations that might otherwise cause drop-offs. My production efficiency has increased dramatically, with the structured approach reducing editing time from days to hours for similar content. The visual and audio treatments create a recognizable style across videos, building brand recognition among subscribers. Most importantly, the strategic use of visual effects improves understanding of complex concepts, which is ultimately the primary goal of my technical content.
Key Takeaways for Tech Video Editors
1. Front-Load Audio Enhancement
Start with AI-powered audio cleanup through tools like Gling.ai. Clean audio makes visual editing decisions more intuitive and dramatically reduces time spent fixing technical issues later in the process.
2. Develop Visual Templates
Create a library of reusable visual elements (lower thirds, text styles, transitions) to save time and ensure visual consistency. Viewers subconsciously appreciate this consistency, which enhances the perceived professionalism of your content.
3. Master the Technical/Visual Balance
Develop a consistent visual language that differentiates between explanation and demonstration segments. This visual rhythm helps viewers understand when to listen closely versus when to observe carefully.
4. Create Custom Project Templates
Build project templates with pre-configured timelines, color grades, and audio settings specific to tech content. The upfront investment pays enormous dividends in efficiency and consistency across multiple videos.
5. Never Compromise on Audio
Invest in quality recording equipment and thorough audio processing—viewers forgive visual imperfections more readily than poor audio. Clear narration is the foundation of effective technical content, regardless of visual sophistication.
Elevate Your Tech Video Production
In creating contents, editing isn’t just about making videos look good—it’s about creating a viewing experience that keeps your audience coming back for more. The time invested in developing your systematic approach will pay dividends in both content quality and production efficiency.
Ready to transform your tech video editing workflow? Book a consultation where I’ll analyze your current process and help develop a custom editing strategy tailored to your specific content needs and technical capabilities.